
This is one of our favorite camp meals. It is a good camping meal for kids, it’s fun to prepare, and it actually doesn’t take very much work. Highly recommend if you’re looking for something new to try out on your Weber on your next camping trip!
Beer Can Chicken Tray: https://amzn.to/2SHgCxN
Weber Kettle Grill: https://amzn.to/2RObMzJ
2-Zone Baskets: https://amzn.to/2ugmkP9
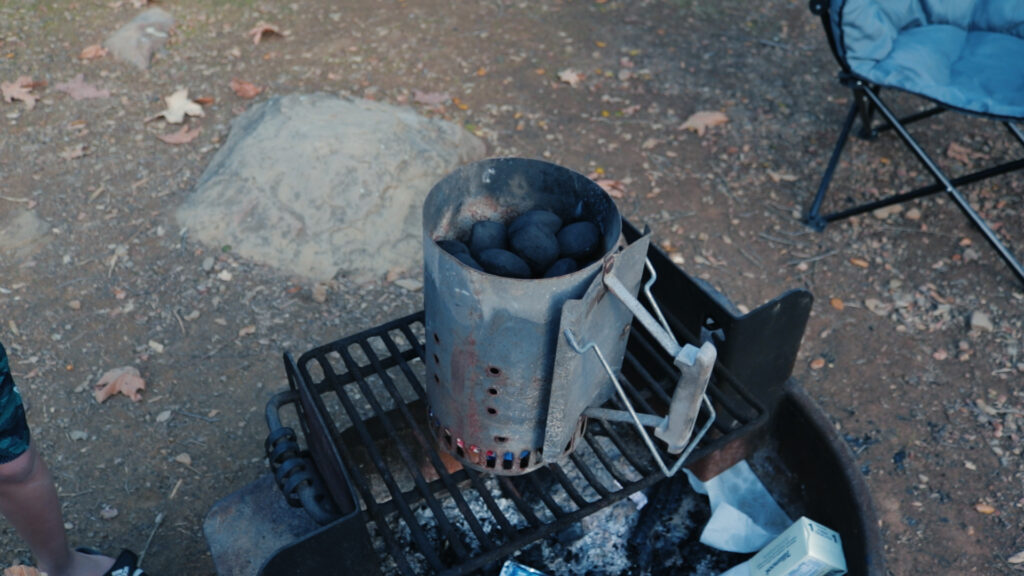
Weber Chimney Starter: https://amzn.to/2OisWmH
This one is really easy to do. All you need is a Weber or some other charcoal grill, some wood chips, a dry rub of your choice–we always use our own rub, which is just equal parts:
1) Brown Sugar
2) Paprika
3) Kosher Salt
4) plus a 1/2 part of Black Pepper
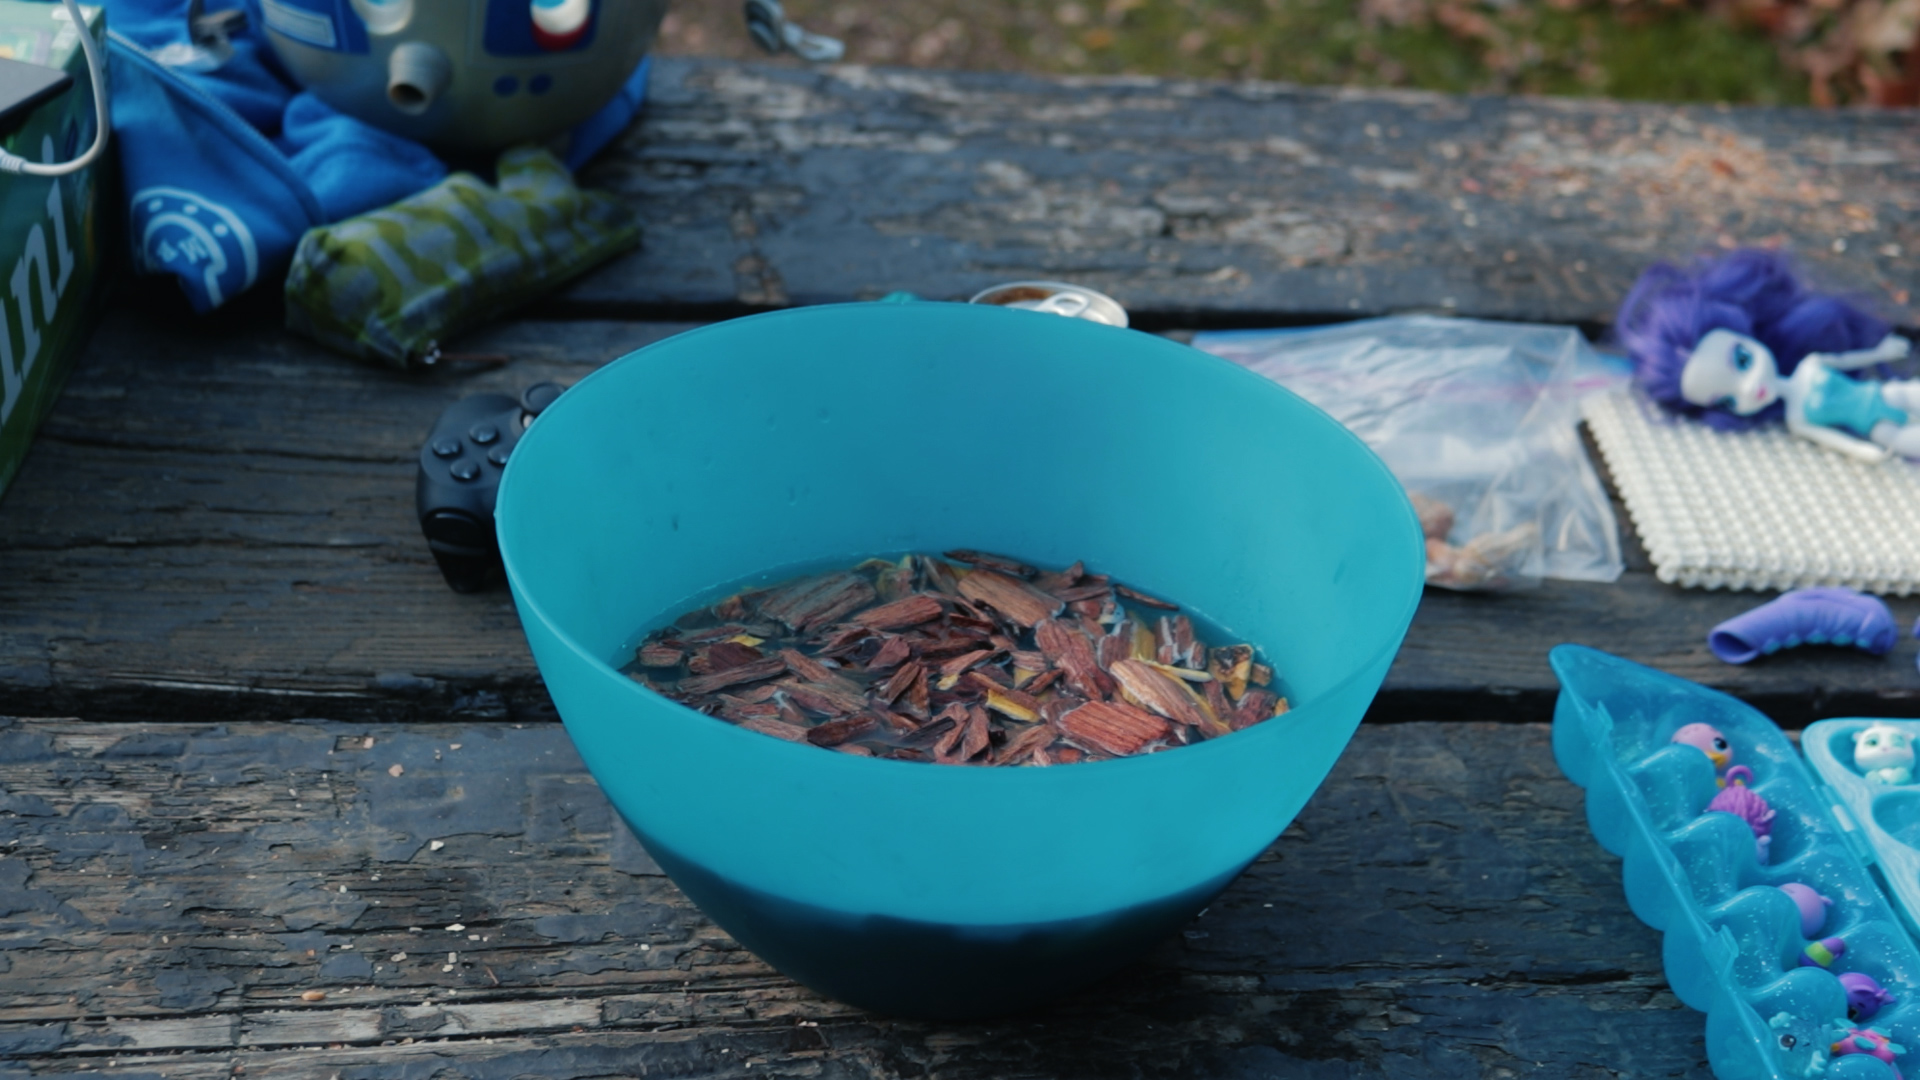
What you want to do is get your wood chips soaking early, so they get nice and damp/water-logged and put off some good smoke while the bird is cooking. We can prep the grill and the chicken. While those are soaking, get your chicken cleaned out and rinsed off inside and out to get that slime layer off.
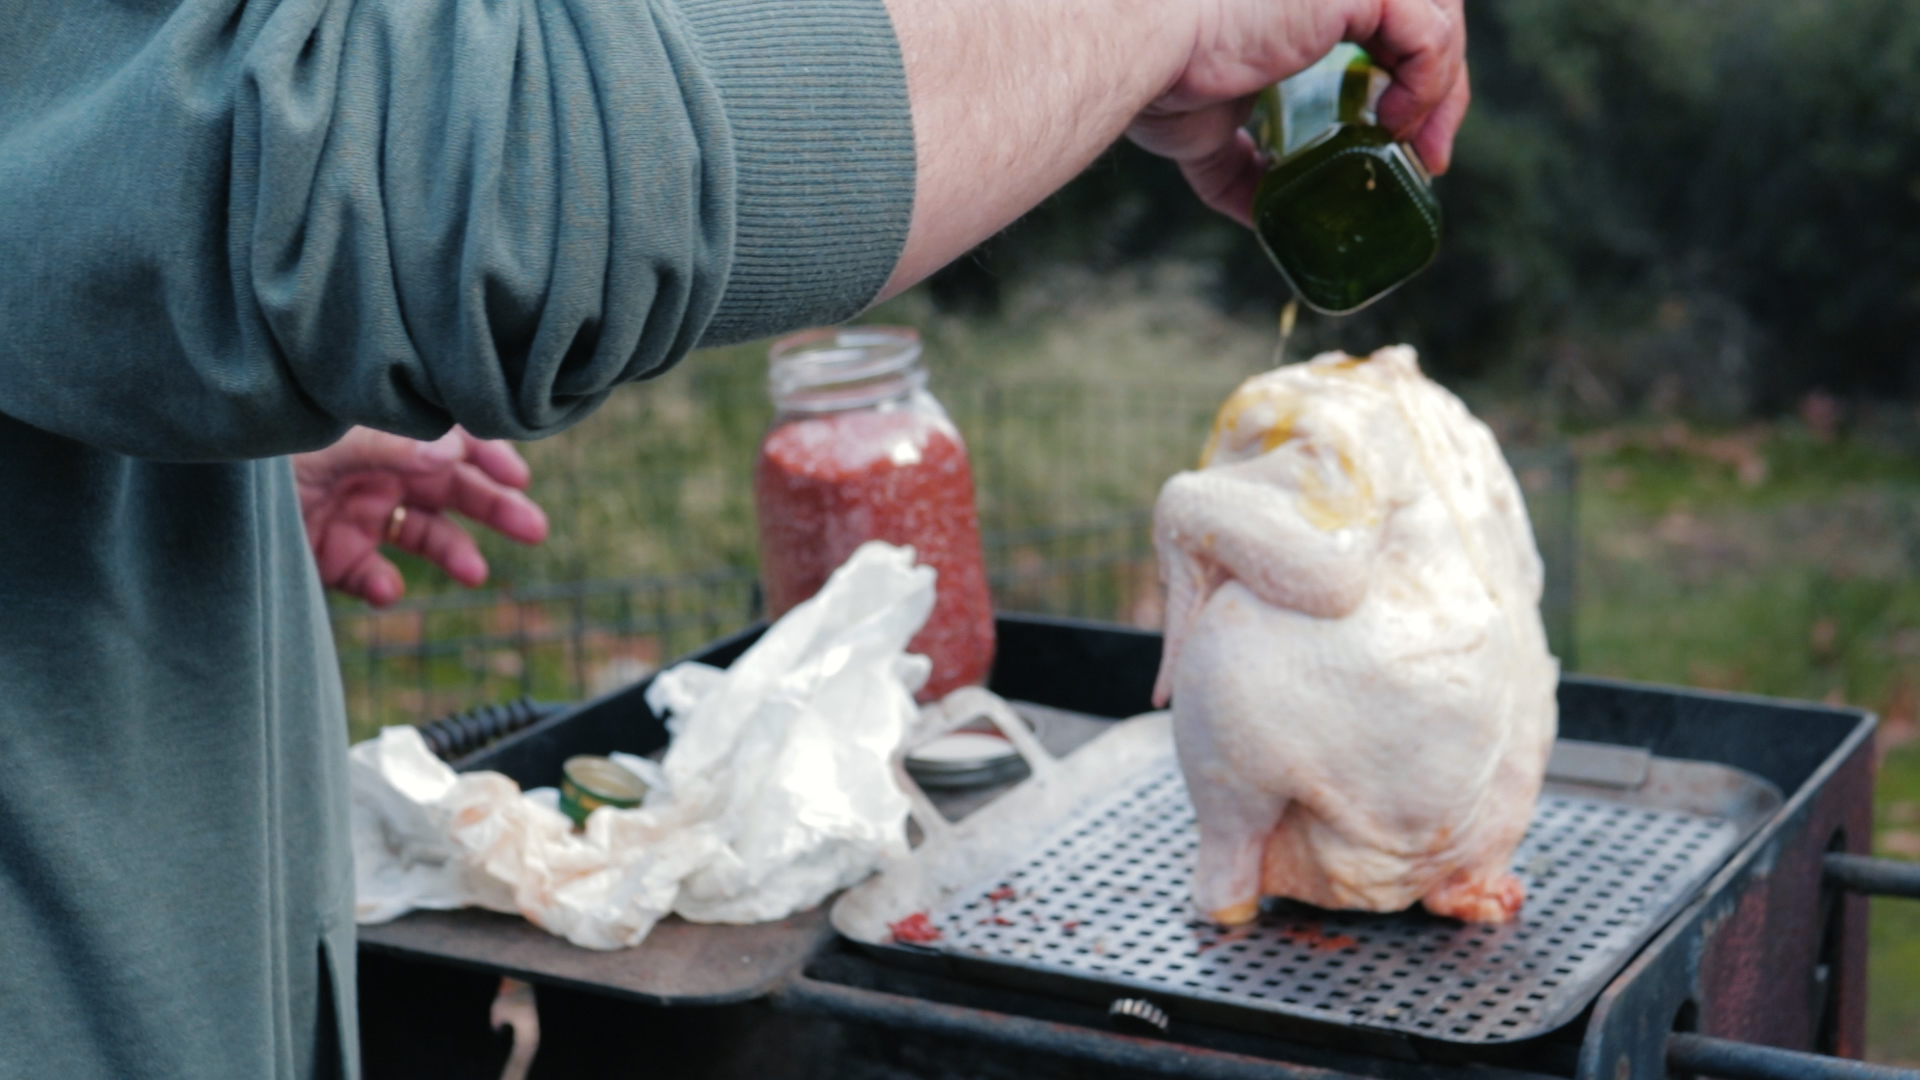
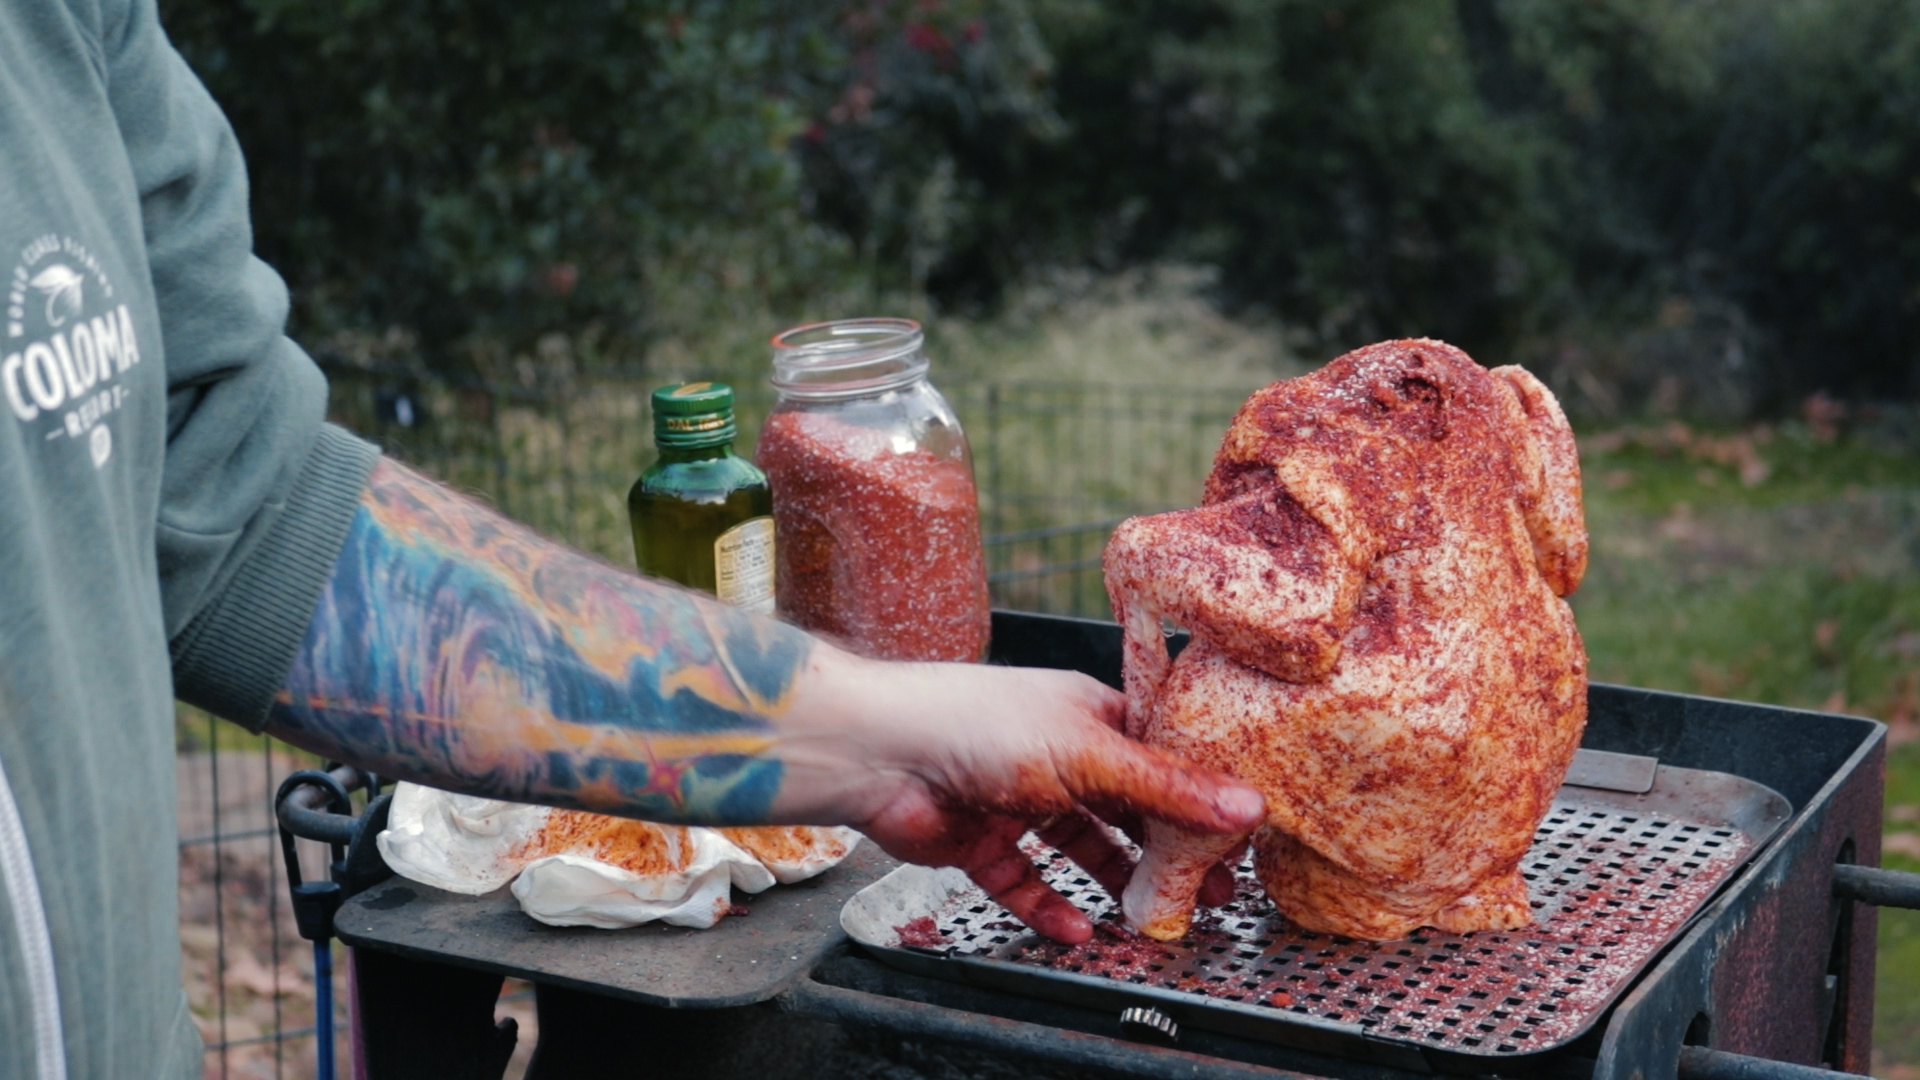
Once the bird is all prepped, then you hit it with a bit of olive oil to give the rub something to stick to and rub it all over. Now we’re ready for the dry rub. Make sure to rub it down inside and out. Put a couple of scoops down the cavity so you get some nice flavor on the inside.
That’s all the prep work you need to do on the bird, so now you want to get your grill ready while that rub does its thing! I got these little charcoal baskets for Christmas and they are great at turning the grill into a 2-zone for indirect heat. If you have one of those chimney starters, then go ahead and fill it about half way with coals and get those going. I tend to have about 8 coals on each side that I leave unlit and then fill the other half of each basket with the hot coals. That way, the rest catch and keep the grill at temp throughout the cooking process.
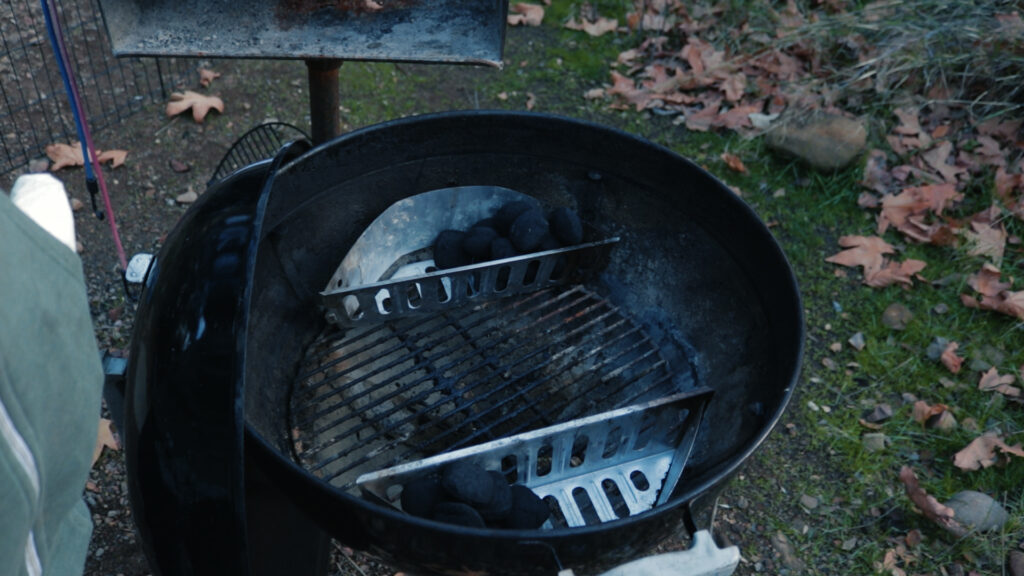
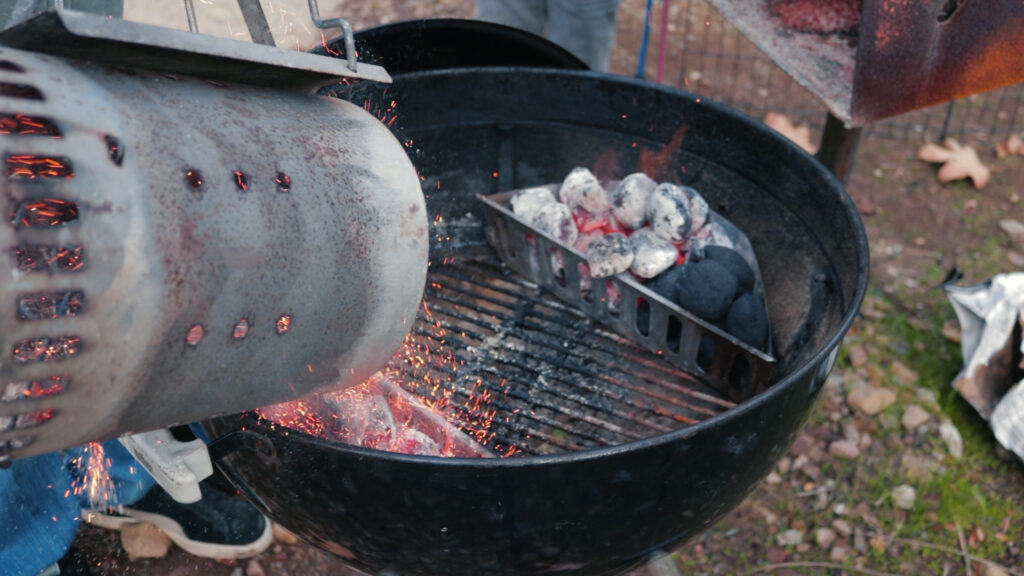
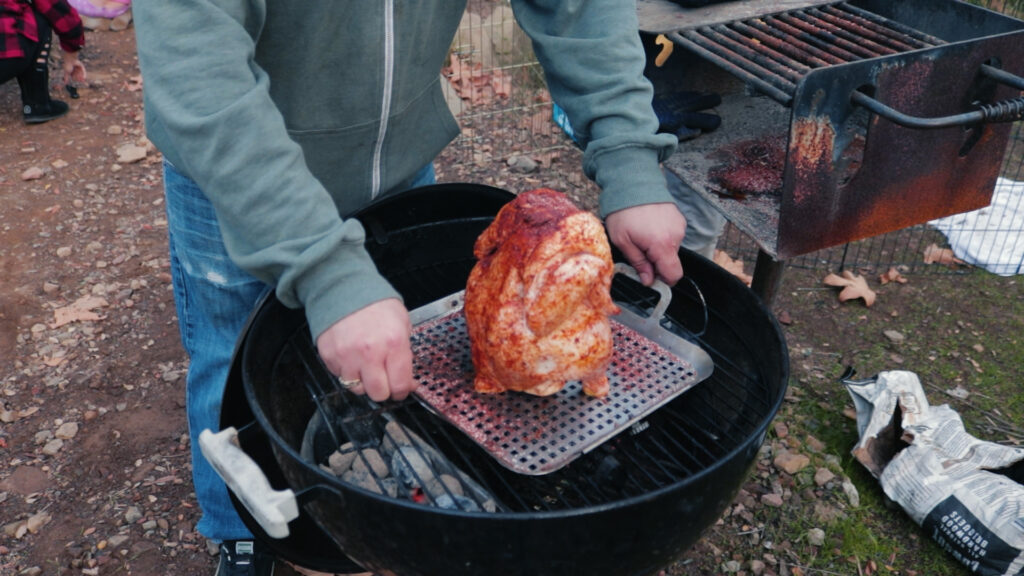
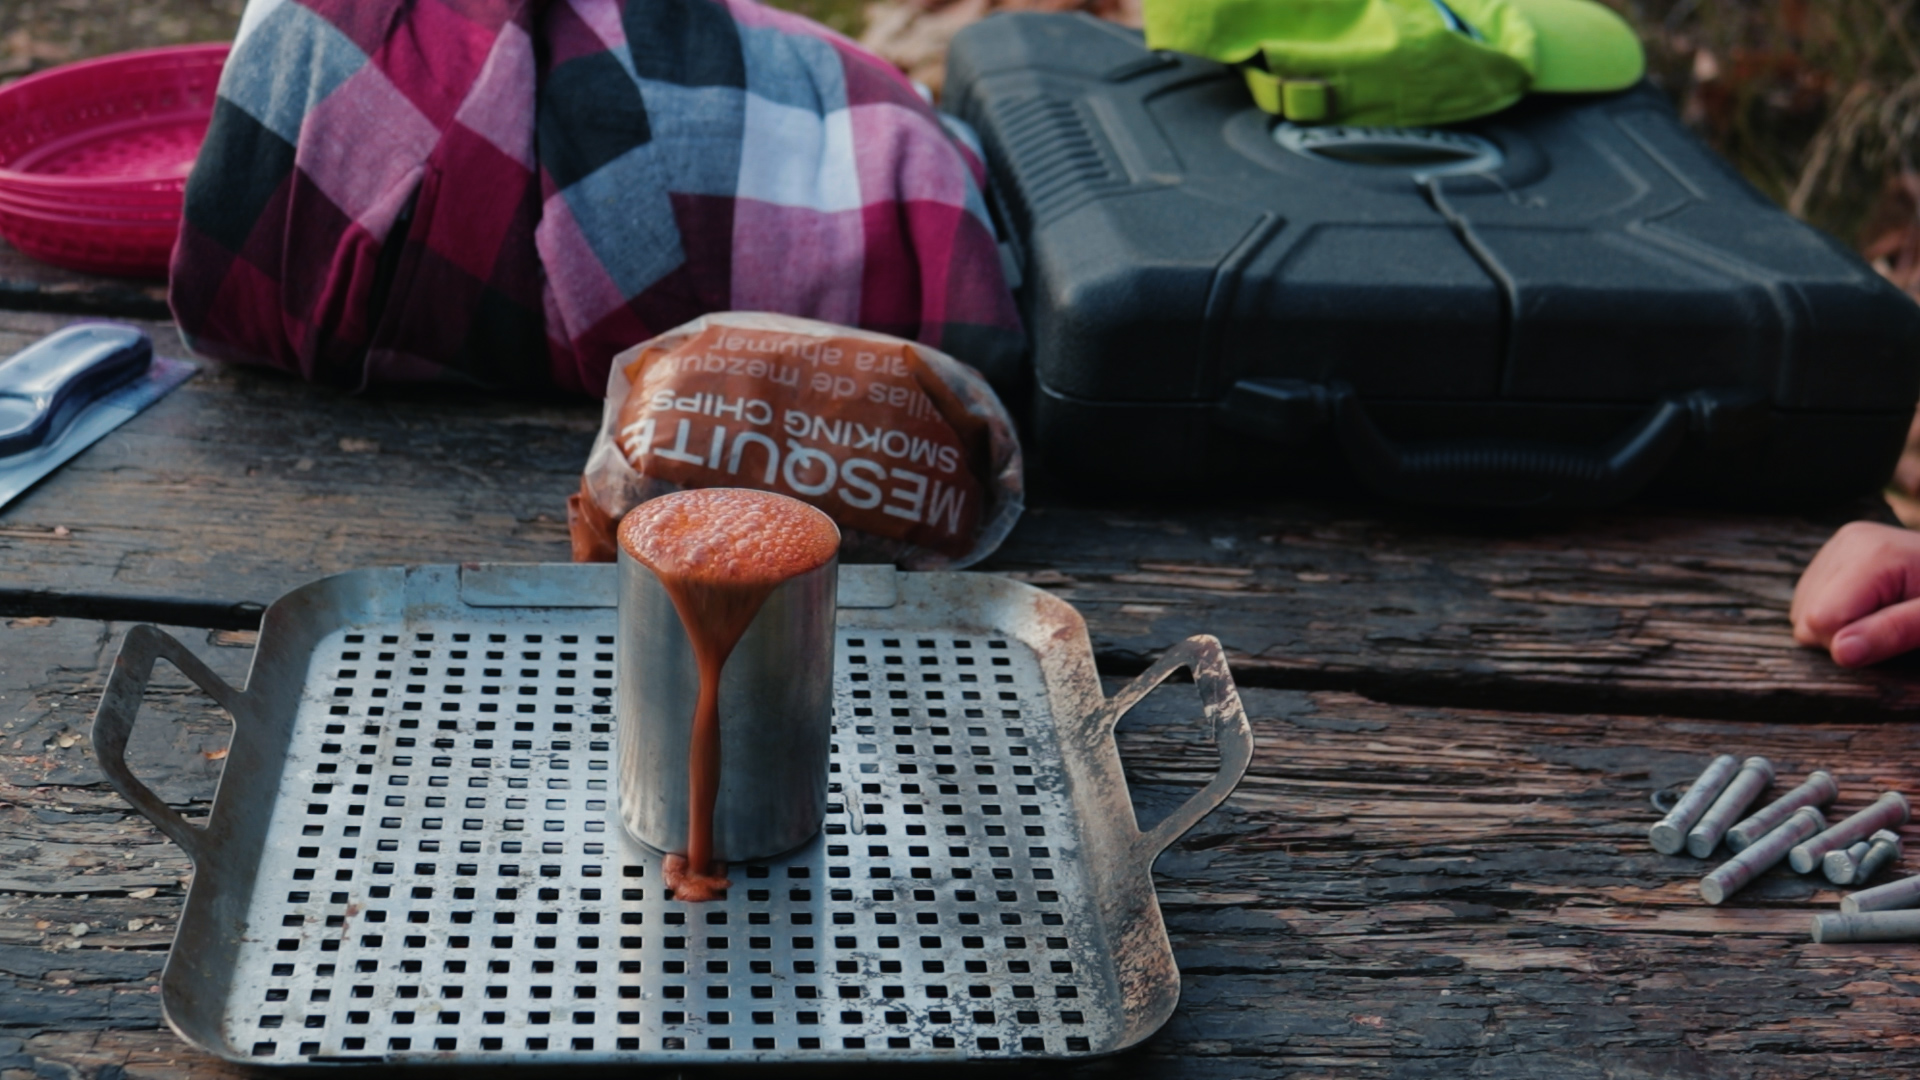
Once those are ready, set them in the charcoal baskets and let your grill come up to temp. Then throw some beer or other liquid in the beer can holder and make sure you put a teaspoon or two of the rub into that liquid as well so you get all that goodness bubbling off on the inside.
Next, you get that bird in the center of the grill away from the direct heat. Sprinkle on some of those wet wood chips, and let it do it’s thing. I typically leave my bottom vents about halfway open and then just adjust the top as needed to keep them lit, but not flaming up. It should take between and hour and two hours depending on how many coals you dumped in and how hot you let them get. You don’t want it super low like you do when you’re smoking, but you don’t want it too hot either. Something like 8-10 coals burning at a time is what I generally shoot for. Keep sprinkling those wood chips on ever 20 minutes or so to keep it nice and smoky, and then you just pull it off and eat.
When we do it nice and slow, the bird gets a nice crispy skin and the meat just falls right off the bones. The wood chips also give it a nice smoky flavor and the leftovers make an amazing chicken salad for sandwiches! That smoke really gives it that extra little bit of flavor that makes it really different and good!


The kids really love it and even though it takes a while to cook, it is actually one of the easiest and best camping meals that you can make. We love eating good food when we’re out there camping in our Rockwood making those memories, and THAT is #WhyWeWork!
We’ll see you on the next adventure!
Support Us on Amazon: https://amzn.to/30tMCHX
Our Essential RV Gear: https://whyweworkchannel.com/amazon/
Rep the Merch: https://whyweworkchannel.com/shop/
Check out our website: https://whyweworkchannel.com/
Follow us on Facebook: https://www.facebook.com/whyweworkchannel
Follow us on Instagram: https://www.instagram.com/whyweworkchannel
Check out the rest of our videos: https://www.youtube.com/c/WhyWeWork
Follow us on Twitter: https://twitter.com/WhyWeWorkChnl
As an Amazon Associate we earn from qualifying purchases, which means we receive a small commission from sales of certain items, but the price is the same for you!